Changing a patients bite and dentition can be a complex process. This is especially true in a terminally dentate patient where their entire dentition is being changed. Many variables are involved in the wax-up process and special considerations must be taken when a guided solution is desired. This is where the Dimple Technique comes into play.
WHEN would you use the Dimple Technique?
The Dimple Technique provides crucial restorative information for terminally dentate patients. If a wax-up and provisional are being made for a terminally dentate patient, the Dimple Technique MUST be utilized.
WHY do we need the Dimple Technique?
In a terminally dentate patient, the surgical guide is designed to seat on the existing dentition. However, the implants will be planned off of the wax-up. Since the existing dentition is being changed completely, there will be no reference points to overlay the pre-waxup model with the post-waxup model. This is where the Dimple Technique comes into play.
HOW to perform the Dimple Technique?
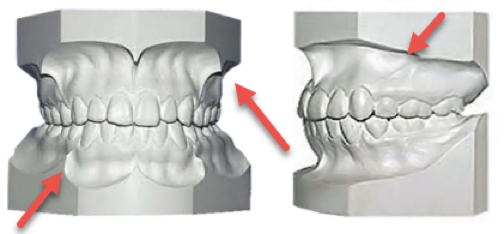
- Take an impression of the patient’s existing dentition, a well captured alginate or a PVS impression are both acceptable. It is very important to include both the bottom of the vestibule and frenal attachments as much as possible
- Pour up a stone diagnostic cast ensuring a nice thick base has been added to the cast.
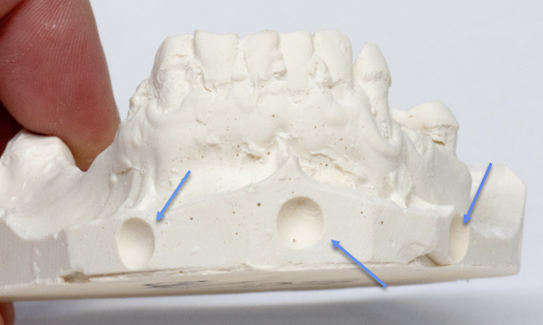
- Once the cast is set and separated, use a round bur or similar instrument to create landmarks (holes/dimples) on the base of the cast. A minimum of 4 dimples is recommended.
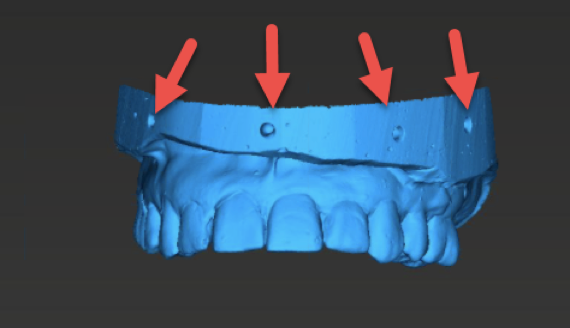
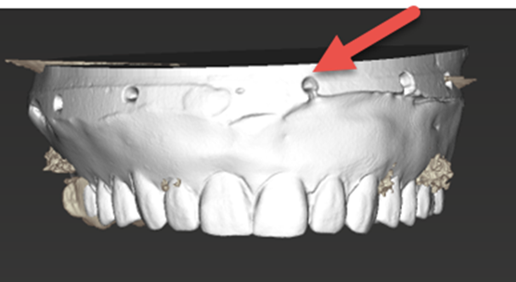
- Digitize the cast (preferably with a surface scanner), ensuring the dimples on the base are captured as well and provide in an .STL format. If you are using an iOS scanner, please ensure you capture anterior and posterior dimples which are commonly missed using this technique.
- This will be our cast of the patient’s existing dentition to overlay to the CBCT. It is crucial that a great STL file has been captured prior to moving on to the next step
- Use the same cast to create your diagnostic wax up of the final prosthesis
- Once completed, digitize the wax-up cast. Ensure that the dimples on the base are captured and provide in an. STL format
Note-If you do not have access to digitize these models to upload them directly to our website, you can print a shipping label from the case in Implant Concierge and have them mailed to us. Following the same steps, you will duplicate your diagnostic wax up to avoid any distortion during transportation and provide both models properly packaged via mail.